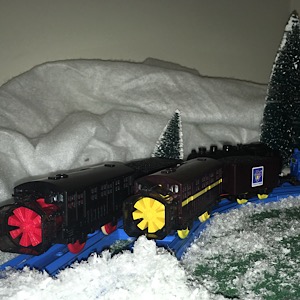
Well not really a train mod but figures I would post this one. So you may have come across this issue and already have a fix or maybe you have found the right size gear. (If you have found the gear, let me know..)
Anyway, here was my dilemma. Some of the older Tomy, especially the Talk n Action engines take a different gear that is not readily available. Here are the specs.
7mm Diameter, 2.5mm bore, and 4mm thickness. There are several places that have the right specs just the thickness is 5mm. These typically will not work though as they are too big.
So I took the 5mm gears I had and then set out to make a "jig" to replicate the gear. BYW,I tried casting these in plastic which did work, but the plastic was somewhat flexible and I did not feel the would be the best thing to use. I scrapped that idea and went with plan B.
Step 1.
If you have a thicker piece of aluminum or steal that may work too, but I took a scrap piece of wood and I had some metal duct from my HVAC. I flattened the metal and used roofing nails to attach to the wood.
Step 2.
I had to try various size bits and practice at the depths, but I found that a 9/32 inch bit seemed to do the trick. Then test the depth by using an existing 4mm gear or scrap to test the dept.
![[Image: E9A2DDAB-0DCD-438A-8E96-F3DAF5600F71_zpsy3tich3x.jpg]](http://i300.photobucket.com/albums/nn5/dawsona17/E9A2DDAB-0DCD-438A-8E96-F3DAF5600F71_zpsy3tich3x.jpg)
Close up:
![[Image: FB581A19-FC0D-46BE-8514-B28EFC9846DF_zpsbqzm9mew.jpg]](http://i300.photobucket.com/albums/nn5/dawsona17/FB581A19-FC0D-46BE-8514-B28EFC9846DF_zpsbqzm9mew.jpg)
Step 3.
I used a dremal with a sanding drum bit to sand the gear down flush with the metal top.
![[Image: 800161B1-117F-4E76-9686-A567182760AA_zpsmhbccdke.jpg]](http://i300.photobucket.com/albums/nn5/dawsona17/800161B1-117F-4E76-9686-A567182760AA_zpsmhbccdke.jpg)
Step 4.
Finally clean up the burs and then they should be ready to go.
Final result in comparison with the 5mm
![[Image: 45951240-A7FE-4942-B97E-69218A084EEE_zpshxpeohht.jpg]](http://i300.photobucket.com/albums/nn5/dawsona17/45951240-A7FE-4942-B97E-69218A084EEE_zpshxpeohht.jpg)
I know not much of a difference but sometimes that all that is needed. Now once you have the gears you can use the tutorial @Super did to replace the gears.
I have swapped a few now and they seem to work great. This got my TnA Henry back up and working. I had super glued his hear but it kept catching and stalling out.
Let me know if there are any questions. Thanks.
**edit**
Link to other thread to replace a gear:
Super's Gear replacement tutorial


![[-]](https://www.blueplastictracks.org/images/collapse.png)

![[Image: 327185DB-698B-4562-AA73-E2966D023D79_zpsarhxg2qo.jpg]](http://i300.photobucket.com/albums/nn5/dawsona17/327185DB-698B-4562-AA73-E2966D023D79_zpsarhxg2qo.jpg)
![[Image: 5E125810-FC96-409F-9D7D-C0E00FD82837_zpswc3ufunv.jpg]](http://i300.photobucket.com/albums/nn5/dawsona17/5E125810-FC96-409F-9D7D-C0E00FD82837_zpswc3ufunv.jpg)
![[Image: A16B3DC4-F918-4AF6-A184-39CDCA4513D8_zpsfydlx5pl.jpg]](http://i300.photobucket.com/albums/nn5/dawsona17/A16B3DC4-F918-4AF6-A184-39CDCA4513D8_zpsfydlx5pl.jpg)