i have a fenbo santa fe, which is in poor shape. missing tyre, horn and battery cover. runs ok though.
i just bought another this morning and decided to turn the old one into a back engine, and make a double header train. my partner runs santa fe HO scale, and this is partly to be cheeky, since he always has multiple units on the front.
to do this, i need to fit a front coupler. i already swapped to a thomas coupler on the rear, and will do the same to the new one.
i used a craft knife and worked at slicing through the plastic on the front. in the process, the blade slipped and did a marvelous job at slicing through my finger. 
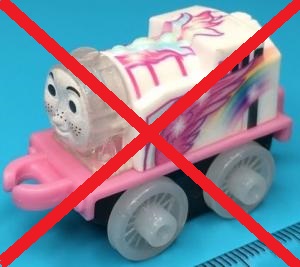
i cut through most of the plastic and then used a spanner to work the two cuts to remove the centre. result was i snapped the "bumper" off, lol. i am going to take it to the club to file down the section needed to allow the width of the hook, and also to glue the piece i broke, back on.
thankfully, being the back unit, the damage wont too noticible.
![[Image: backunit.jpg]](http://i1209.photobucket.com/albums/cc399/sunhuntin/backunit.jpg)

Oooohhhh, hobby knife hit! Had plenty of those before! Nice reconstruction! To cover up roof damage to the top area of the locomotive you could put US flags or maybe even HO scale figures! I did that to an older engine I had, which had two or three main bad marks on the footplate. I covered them with fisherman as it was an old Thomas, and made a Gone Fishing Thomas from the classic episode! It's actually a lot of fun restoring engines ! Despite the knife cuts and constant mistakes that end up hurting your hand. Lol. Good luck on the final product 
From Thomas To Today's Modern Diesels, They're All A Part Of My Rail-Yard!
(This post was last modified: 07-06-2014, 02:08 AM by Trackmaster-Rail-Yard.)

I use allot of HO and OO parts on my customs, a pair of correct (or incorrect) HO horns would not cost much even in brass and a lick of paint would look fantastic! Go Go multiple units! for the tire perhaps cut a spare tomy tire down to the right size and a dab of superglue at the join, I prefer loctite brand
thanks guys. a scaled down flag might be a go, or if i can find a horn i will use that. good idea about cutting down a thomas tyre, might be the best bet i think.
i gave up waiting for the glue to dry, so left it on the fridge at the club and it can sit there til thursday, lol. glued the hook on, havent done the bumper yet. will need to reinforce that i think, given the plastic is reasonbly thin and the joins will be on the curves a bit.
it occured to me during gluing, the front coupler is higher than the back one, so the new one will need the coupler fitted at a different spot to line up. looking at it, i couldnt have really done anything else, as to get it the right height would have meant putting it at the bottom of the shell. it would have had no support, as the plate at the bottom unscrews to allow access inside.
dont anyone even suggest black couplers... it wont be happening!
![[Image: fbackunit4.jpg]](http://i1209.photobucket.com/albums/cc399/sunhuntin/fbackunit4.jpg)
this shows the height difference.
![[Image: fbackunit3.jpg]](http://i1209.photobucket.com/albums/cc399/sunhuntin/fbackunit3.jpg)
sunglass props
![[Image: fbackunit2.jpg]](http://i1209.photobucket.com/albums/cc399/sunhuntin/fbackunit2.jpg)

super, how does that first tool go with effectively cutting a box in the middle of plastic? thats what i was trying to achieve.
we have those hobby wheels in the last pic at the club, but couldnt see how it would work, given i only needed a big enough hole for the coupler.
yeh, i dont recommend kids using knives etc without supervision. ive been using them since i was about 9, mainly for sharpening pencils, and have one in constant use at work, opening boxes, cutting them down for disposal etc. even with all that experience, accidents can still happen.
heres the set i got, for $10. hopefully the grey tracks will fit tomy girders and i will use them emery
![[Image: fenbo.jpg]](http://i1209.photobucket.com/albums/cc399/sunhuntin/fenbo.jpg)
Thats easy...all you need is an awl and a drill. Choose a drill bit a little smaller than the size opening you want. Then follow that up with the small hobby files to square up the hole. The hobby saws can also be used to square up the hole if its big enough or if you need the hole to be rectangular. The awl is a must as it marks the exact spot on your model and so your drill bit will not wander. Make sure you make a good starting point with your awl and be careful as the awl point is sharp. Kids, get Mom or Dad to help!
sweet, thanks for that. will remember for next time. dont often do things like this.
The most import thing is to just take your time and you can make it look like it came from the factory that way.

Interesting set and mod.
As for cutting, I'm a big fan of razor saws when there is enough clearance, though it wouldn't work for this kind of thing.
For interior cutting, A rotary tool is awesome. Usually I can do most of the work with the rotary tool and then finish it up with a set of files.
The replacable wheels are nice for fine work. However, for the rough cutting, or when you only need to save one side of what you're cutting, this wheel:
http://www.farmandfleet.com/products/571...7w5N1xtcy4
is awesome. It's expensive, but it's virtually indestructible and is as good for shaping using the top as it is for cutting using the side.
I've chopped apart tons of toys with it for use in scratchbuilt wargaming terrain, allowing me to save all the useful bits and panels and get rid of the rest.
|

![[Image: backunit.jpg]](http://s1209.photobucket.com/user/sunhuntin/media/backunit.jpg.html)
![[-]](https://www.blueplastictracks.org/images/collapse.png)
![[Image: fbackunit4.jpg]](http://s1209.photobucket.com/user/sunhuntin/media/fbackunit4.jpg.html)
![[Image: fbackunit3.jpg]](http://s1209.photobucket.com/user/sunhuntin/media/fbackunit3.jpg.html)
![[Image: fbackunit2.jpg]](http://s1209.photobucket.com/user/sunhuntin/media/fbackunit2.jpg.html)
![[Image: ua-2600_zpsc36a05c7.jpg]](http://s1231.photobucket.com/user/conameche/media/Super/ua-2600_zpsc36a05c7.jpg.html)
![[Image: 13L_zpsa5c316e6.jpg]](http://s1231.photobucket.com/user/conameche/media/Super/13L_zpsa5c316e6.jpg.html)
![[Image: 35_zpsb20a2215.jpg]](http://s1231.photobucket.com/user/conameche/media/Super/35_zpsb20a2215.jpg.html)
![[Image: 345_zps87fa16d6.jpg]](http://s1231.photobucket.com/user/conameche/media/Super/345_zps87fa16d6.jpg.html)
![[Image: super-smiley-emoticon.gif]](http://www.sherv.net/cm/emo/word/super-smiley-emoticon.gif)
![[Image: fenbo.jpg]](http://s1209.photobucket.com/user/sunhuntin/media/fenbo.jpg.html)